Saturday, July 19, 2014

The BIGGER (Stained) Coffee Table Reveal!!

It is FINALLY time to reveal our stained coffee table!!  Yes, I am writing a Saturday post because I didn't write a Friday post.  Don't hate!  I spent all of Friday staining this beast.  For once, I'm going to let you see the finished product within the first paragraph of our post.  What, what!!  Here she is in all of her beauty!


Now don't stop reading!  We have so much more to tell and show you!

Let me show you how we got to our finished product.  In our last post about the coffee table, we left off here, so let's continue from there.

After the initial build of the table, we still had a lot of sanding to do.  This past Wednesday night we took the table out to our deck and sanded it down with 120 grit sand paper.  Yes, it was a joint effort to sand down this thing.  We tried to sand down the top boards as much as we could to make them all look like they were around the same color.  Here's a quick snapshot of the table after we sanded it down:


Gotta love iPad pics.  I don't have a picture of it, but after sanding the table, I wiped it down with a damp cloth just to get off any loose wood debri (is that even a thing? Who knows, but that's what I'm calling it).  Then we took our stain of choice and tried it out on a spare piece of sanded wood.  Note to self: 1.) sand the spare piece of wood with the same sandpaper grit that we sanded the table with in order to get a true depiction of what the stain will look like and 2.) stir the stain with a paint stick before applying it (otherwise the coloring sits at the bottom of the can).  Here's Eric testing out the stain:


The above picture is a false depiction of what the stain actually looks like.  Eric forgot to stir the can of stain before applying it.  Can you tell it's our first time ever staining?  We're amateurs, people!

Our stain of choice was this one.  We thought it'd be easiest to use an all-in-one stain that already had polyurethane mixed into it.  Truth is, if we had it to do over again, we'd buy just a stain and then buy polyurethane to put on top.  Oh well.  The color we chose was "Tudor" in a satin finish.
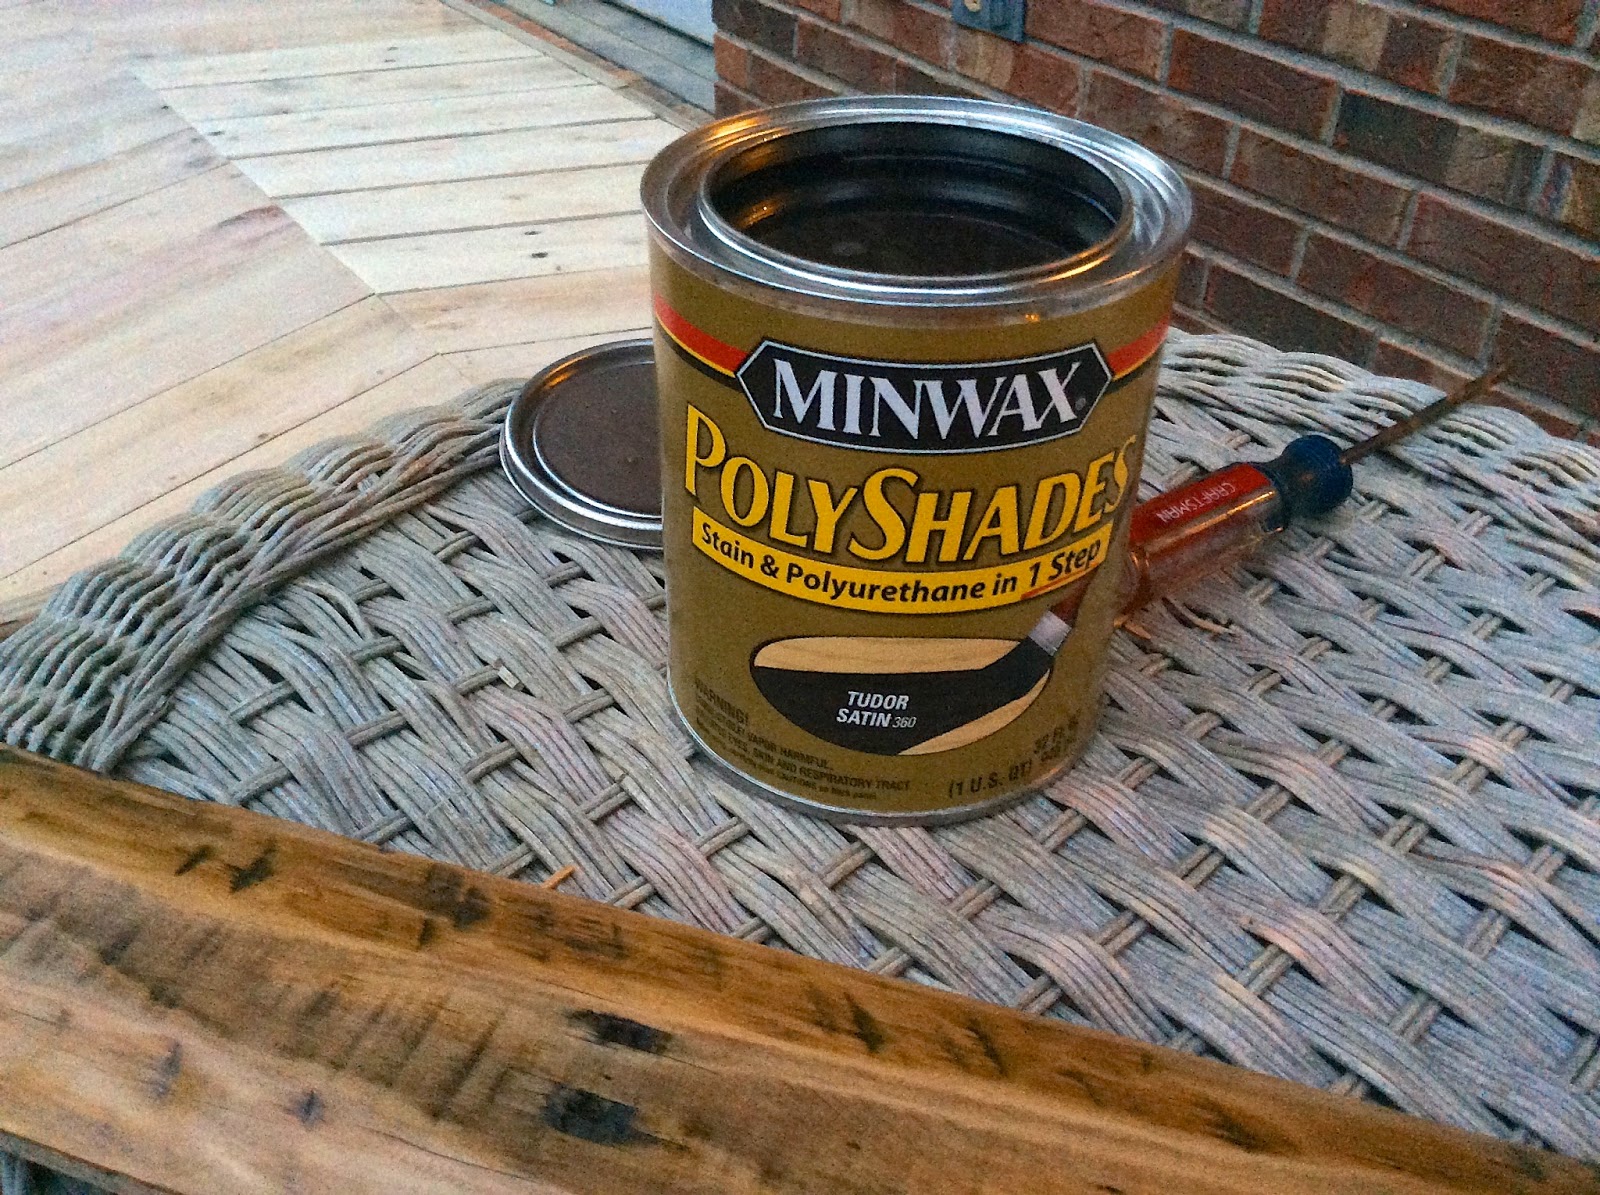

Thursday night we got busy putting the first coat of stain on the table.  


Here are 5 quick tips for staining:

1. Apply the stain starting in the middle of each board and brush back and forth to cover all surfaces.
2. Work with the grain of the wood.
3. Make sure to wipe off any excess stain that gets in between cracks or on the edge of the table (if it dries before wiping it, you will likely have something that looks like a runny mess).
4. Stain in this order: top, sides, legs.
5. Make sure you are staining in a well-ventilated area.


We originally thought that we'd only have to apply one coat of stain.  This picture had us all, "Wow, for only putting one coat of stain on, the table looks great!"


The table was still wet when I snapped this picture.  After it dried, we were left with this:


Obviously we had already started the second coat, but I love that you can see the difference between the first and second coat.  We were not the slightest bit pleased with how the table looked after one coat.  The boards looked like they had a gray coating over them.  Not what we were going for at all!  We wanted the table to have a dark rich color.  I spent a good chunk of my day yesterday finishing the second coat and applying stain to the legs.

Something I want to point out is that certain boards needed a third coat of stain.  In our original reveal picture of our table, it was pretty noticeable (at least to us) that 6 of the top boards weren't the same color as the rest.


Note to future self: when building something like a table out of pallet boards, make sure to use boards that are all close in color after sanding.  Otherwise you end up with this problem.

After the first coat of stain, you could still tell where these six boards were.  They didn't quite blend in with the rest of the boards.


After a second coat they looked a little better, but a third coat on just those six boards really did the trick.  Hallelujah! Coating the legs of the table was a similar process.  They too were a lighter color to start.  Here's how they looked after the first coat of stain:


And so on went another coat, which is how we ended up with our finished product.  (Another side note: we decided that if we ever build another coffee table like this that we will change the style of the legs.  For our next coffee table build, we plan to take two pallet boards and assemble them into the corners of the table on the outsides).


 Bet ya can't tell where those six "oddball" boards are in the photo above.  They are oddballin' (yup, just made that word up, so what?!) no longer!


We are beyond excited to replace our old wonky outdated table with this sturdy beast.  I've already tried out some decorating options for the top!

Let's play a game.  The game is called, "What's the Cost?"  How many of you (just by looking at our table and not knowing the whole process that went into making it) would say that our table cost us somewhere between $50-$100+ to make?  Do I see a few hands raised?  I know that when I looked into buying a new coffee table online, the price for a nice one was always way over a hundred bucks plus shipping. Well guess how much this DIY pallet coffee table cost us.  A grand total of $13 ($12.87 to be exact, but we'll round it to $13)!!!! Can you believe it?!  For those of you thinking, "Man, maybe I should DIY my own coffee table..."  We say, "Yes!  It's a total win win!"  We will say, that in order to build this table for $13, you kind of have to have some tools or know somebody that would be kind enough to let you borrow their tools.  Here's a rundown of the materials we used to build this marvelous table:


Materials Needed for This Project:
(Note to those of you wanting to build this table: The cost is likely going to change for you if you don't already have a lot of these materials.  We already had (or borrowed) all of our materials on hand, which made it nice.  The only thing we had to buy was the stain).

-Pallet Boards (you can typically find them on Craigslist or from people you know for FREE!) (We used boards from a total of probably two full pallets)
-Hammer & Pry bar (to free boards from the pallets)
-Sander (we have this one)
-Sandpaper (we used 80 grit sandpaper to initially sand down each board, then we used 120 grit sandpaper to sand down the table after it was built)
-2 1/2 inch outdoor wood screws (these are used for the base of the table and the legs) (See how we constructed the base here)
-Miter saw (set to a 20 degree angle to make the herringbone pattern)
-Nail gun and nails (18 gauge 1 1/4 inches)
-Circular saw (we borrowed our neighbors) (Read more about what we used this saw for here)
-Wet wash cloth (to wipe down table after final sanding/before staining)
-Your choice of stain (we chose Polyshades Stain & Polyurethane in one--Color: Tudor--Finish: Satin)
-Staining brush

And that's it!


Now to sit back and enjoy our handiwork.  Let us know what you think of our table in the comment section below!  If you decide to build one for yourself, share some pictures with us or send us the link. :)


Thursday, July 17, 2014

Whip It Up Wednesday: Cream Cheese-Filled Banana Bread

Happy Thursday!  Since yesterday's post was all about our one month blogiversary, we missed our "Whip It Up Wednesday" post.  So, I bring you a recipe on Thursday instead! :)  Our recipe today is one that I found on Pinterest.  I had bananas that were browning and cream cheese that needed to be used by August, so this recipe was perfect. You may find the original recipe here.

Cream Cheese-Filled Banana Bread:

Ingredients for Bread:

1 egg
1/2 c. brown sugar, packed
1/4 c. canola oil (the original recipe calls for coconut oil, but I used canola)
1/4 c. sour cream (I used Light French Vanilla Yogurt Fruit Dip because it's all I had)
2 tsp. vanilla extract
1 c. ripe bananas, mashed
1 c. flour
1/2 tsp. baking powder
1/2 tsp. baking soda
pinch salt, to taste

Cream Cheese Filling:

1 egg
4 oz. cream cheese, softened
1/4 c. granulated sugar
3 Tbsp. flour


The How To:

1. Preheat your oven to 350 degrees.  Spray a 9x5 inch loaf pan with cooking spray.

2. To make bread, mix egg, brown sugar, canola oil, sour cream, and vanilla in a large bowl.


3. After mashing the bananas, add them to the bread mixture. 

4. Fold in 1 cup of flour, baking powder, baking soda, and salt.  Do not overmix!


5. Pour approximately two-thirds of the batter into the loaf pan.  Smooth the top with a spatula, making sure to push the mixture into the corners.


6. To make the cream cheese filling, add all of the filling ingredients listed above and whisk together.


7. Pour filling mixture on top of the bread mixture that is already in the loaf pan.  Smooth the top with a spatula, making sure to push the filling into the corners.

8.  Pour the remaining bread batter into the loaf pan, smoothing the top with a spatula.

9. Bake bread for around 48-50 minutes or until the top is golden brown.  If you put a toothpick in it to check if it is done, be aware that the cream cheese mixture will never really harden, so the toothpick may come out a bit moist.

10.  Allow bread to cool for approximately 15 minutes before cutting and removing it from the pan.  This particular bread will keep airtight at room temperature for up to a week, or for up to six months if put in the freezer.


Enjoy!  I think the inside of the bread looks pretty awesome!  If you ask me, this bread is best served warm. :)

Have you ever tried cream cheese-filled banana bread?  If so, did you like it?  Or do you have another awesome banana bread recipe?  Share it with us!  We'd love to try it! :)


Wednesday, July 16, 2014

One Month Blogiversary!

It is hard to believe that I've been blogging for a month.  Time flies!  I thought it would be fun to review what's gone down in the past month.

So let's start off with a list of things that we've accomplished so far:

Front Entryway Projects:

-Painted stripes on wall facing front door (Read about it here!)

-Scraped off popcorn ceiling, primed, and painted (Read about it here!)

-Put up our new light fixture

-Painted walls in Treasure Map by Olympic

-Bought console table and a few decorative accessories

-Laid out photo collage on striped wall

-Removed closet doors

-Cased in one of our entryway doors (Read about it here!)

-Spackled and sanded our cased in doorway (Read about it here!)


Touring Rooms of our Humble Abode:

-Powder Room (Read about it here!)


Master Bath Projects:

-Tried to clean/brighten our floor's grout (Read about it here!)


Family Room Projects:

-Steam cleaned our white carpet (Read about it here!)

-Showed our pallet board coffee table inspiration, base building, and the big reveal (Read about it here!)


Outdoor Projects:

-Planted colorful flowers in our front garden beds (Read about it here!)

-Began power washing our fence (STILL working on it, but read about the beginning here!)

-Trimmed back a ridiculously overgrown rose bush in our backyard (Read about it here!)


Other Life Events:

-Attended two weddings, one of which we were both in (Read about it here!)

-Shared three recipes on my Whip It Up Wednesday series (Read about them here, here, and here!)


Looking back on what all we've accomplished in the past month is kind of crazy.  It seems like we've accomplished a lot by looking at the list above, but in reality we feel like we still have SO much to do around here before summer is over.  This is why I love blogging though.  I enjoy being able to look back at the past month and see everything that we've done and to remind myself of the things that still need to be done.

We do want to take a minute to thank all of you who read our blog. We are actually floored at the amount of readers and pageviews we've had in the past month.  We have had over 1,700 views in the past month!  I'm sure that is like a day's worth (or half a days worth) of views for well-known bloggers, but for little old us, we think 1,700 views for our first month of blogging is pretty darn good!  We also love to look at the statistics part of where people are viewing our blog. It is amazing to us how many different countries our viewers are from!  Here's a chart breakdown:

I know it may be a little hard for some of you to read, but here's a list of the countries from left to right and the number of page views from each: United States (1655), Russia (21), Ukraine (10), Germany (8), Canada (7), Dominican Republic (6), Singapore (4), Paraguay (3), Netherlands (2), China (1)

We cannot thank all of you enough for reading our posts.  You all are the reason we keep writing!  Here's to hoping that we'll have another month of success and accomplishments! :)

Do you have a blog?  If so, how long have you been blogging?  Do you find it to be as relaxing as I do to write posts?  Share your blog with us!  We'd love to check out what's happening in your life! :)


Tuesday, July 15, 2014

Coffee Table Reveal!!

Yes, it is time!  Time to reveal our DIY coffee table that is 100% made out of pallets.  Are you as stoked as we are to see it completed?!  Well before we show you the finished product, let us back up a bit and begin where we left off in our last post (yesterday's post).

Yesterday I shared a picture of our base and you saw a picture of me sanding down the boards that were used for the top of the table.  After I sanded the boards, it was time to make some cuts and nail them into the top of the table.   First, Eric screwed down a scrap piece of plywood that we had in our basement to give himself a straight edge to maintain the center line.  As he was nailing in the boards, he made sure to butt them up against the piece of plywood.  Here's a picture of one side almost completely covered:


As you can see from the above picture, we decided to go with a herringbone pattern for our coffee table.  Eric cut all of the boards at a 20 degree angle with his miter saw.  We decided that we wanted the boards to come together to make a point (hence the herringbone pattern), but we wanted our points to be a little more subtle (which is why we did a 20 degree angle).  Here's a picture of Eric hard at work:


From the above picture, you can tell that the boards we put on top of the table are hanging off the frame.  We will take care of those a few pictures down, so keep reading. :)
Little by little, Eric nailed in all of the boards to the top of the table.  Here's what the table looked like after nailing in the boards:

And here is a side view:

Once the top was on, we cut, sanded, and screwed in the legs of the table.  They are made from thicker pallet boards and are 16 inches long, which makes the table a bit taller than our current coffee table.  Here you can see a close up of the legs and side of the table.

I love to look at the top of our table.  It makes my heart smile.


The next step was to trim the top boards (they were hanging off the frame quite a bit) so that they aligned with the frame and each other.  Our neighbor saved the day once again by letting us borrow his circular saw (which meant that we didn't have to spend money buying one).  With the circular saw, Eric  trimmed the boards flush with the frame.


Here's the table post circular saw:


We then decided that we wanted to frame in the sides of the table (if you scroll back up 5 photos, you can see that our original base is showing on the sides still).  We had 4 long boards to use for the frame.  We came across a few problems when we went to use these boards.  Our first problem was that the boards weren't quite long enough to cover the length of the table.  To solve this problem, we figured that we would just cut the boards so that we had two long pieces on each side that met in the middle (making there one joint on each side).  Unfortunately we discovered that we didn't have enough boards to do this.  We had to get creative.  Our next option was to put three boards of equal size on each long side of the table (making two joints on each side).  Thankfully we had just the right amount of boards to do this option.  Here's what the table looks like after framing it in:


Looks pretty good, right?!  We were impressed!  I will note that one step we left out until we framed in the outside was cutting little pieces to fill the corners of the top of the table.  Here's a couple of before pictures, which show the missing pieces:


And after filling in the corners:


Ta-da!  We now have a handmade coffee table made out of pallets.  It feels good to have a new table to replace our old one with the wonky legs.  We love that our hands made this table and we think it'll be something cool to tell our kids about someday.  Our first piece of furniture that we made together.  We are anxious to get some use out of our new table, but first we need to go back and sand the table once more and then we plan on staining it.  For now, we get to sit and stare at our rustic beauty.  Check out these cup coasters hubby made out of scrap wood!


We are VERY excited about our new table!  What do you think of our table?!  Tell us in the comment section below! :)


Monday, July 14, 2014

Give Me B-A-S-E

This past weekend, Eric's family popped in for a quick two day visit on their way back home to North Carolina. It was a very relaxed visit, but was lots of fun!  Eric's brother and sister-in-law were quick to ask about why we had pallet boards chillin' on our deck out back.  We told them about our ideas to build a table (preferably a coffee table).  The next day, Dawn (Eric's sis-in-law) and I got busy tearing apart pallets.  Whoever says women can't be handy, clearly hasn't seen the Williams sisters.  I'm pretty sure our arms looked as good as Popeye's after eating spinach when it was all said and done.  For anyone looking to tear apart pallets, let me give you some tips on how to take out the nails and pry off each board without splitting it.

Pallet Board Removal Tips:

1. Use a hammer and a thin pry bar (it's easier to have one person with the pry bar and the other person with the hammer, however it can be done alone if you don't have another helper).

2. The pallet boards are attached in three places (sometimes four depending on the pallet)--top, middle, bottom.

3. Use your hammer to pound out the top portion of a board just enough to get your pry bar in there.  If you can use your pry bar to pull out/free the top portion of the board from the pallet base, that's great.  If not, keep pounding with the hammer on that section until it comes loose.

4. Once a section (ex: the top of a board is loose, but the middle and bottom of that board are still attached) of the board is loose from the base, pound the board back in to the base so that you can remove the nails (they will most of the time stick out for easy removal).  We learned this the hard way--the first couple of pallets we weren't removing the nails this way and were just hammering the boards until they were completely loose with nails still in them.  When we did this, the nail heads were getting stuck inside of the boards and making it VERY difficult to remove them.

5.  To avoid splitting the boards while pounding, try to hammer close to where each board is attached to the base instead of pounding smack dab in the middle of the board.  We discovered that once the pry bar was in between the base and the board, we would pound nearest where the pry bar was located on the underside of the pallet.  Dawn would try to pry the board back while I hammered in each corner of the board.

Hopefully those tips make sense.  It would've been easier to explain them with pictures, but silly me didn't think to take pictures of each step while doing it.

We took apart three pallets and had this pile of boards to show for it.


We were never so happy to see these boards free from their base!  I am SO grateful to have such an awesome sister-in-law who is willing to tackle projects with me---and who shared in my grunting while trying to get apart these crazy boards.

Now to the reason why we tore apart these pallets.  Eric and I have had this coffee table for around 5 years.


It has water stains on it and it's legs are completely unstable.  You can't tell from the above picture, but you can sort of see from these pictures that the frame is completely falling apart.


If anyone is overdue for a new coffee table, it's us.  So on Saturday we began working on sanding down the pallet boards and building the base of our future coffee table.  We decided that we were going to use the base of the pallet boards for the base of our table.  Makes sense, right?!  Here's a picture of Eric sanding down one of the base boards.


After the base boards had been sanded, Eric trimmed the ends of the boards to make sure that we were working with perfectly straight edges.  


We then laid out the boards to decide how wide we wanted our table.

Then Eric got busy screwing the boards together.


We decided to go with a herringbone pattern for the top of the table, so we not only needed a middle board for support, but we also needed a board there to nail into.  Eric measured to find the middle of the table and screwed in the last board.

And here folks, we have a base for our coffee table!  Phase 1 is complete!


The next step was sanding all of the boards that we planned on using for the top of the table.  Here's a lovely snapshot of me sanding one of the boards.


We actually already have the whole top of the table done, but I'm going to make you wait until our next post to see it.  :)  Tonight we plan on framing in the top of the table.  Hopefully we'll be back with a post tomorrow to reveal our table to you!  Cross your fingers!

What did you get into this past weekend?  Did it involve lots of sanding?  My wrist still hurts from all of the sanding I did last night! Ahhhh!